FrontBack Scanner · Application Help
Every Control, One Page
The everyday flow is four clicks: Preview, Scan, flip the photos, Scan. This page covers everything past that: zooming in on the bed, rotating a crop by a fraction of a degree, rewiring a front-and-back pair by hand, and the shortcuts that make a big session fly.
Orientation
The Window at a Glance
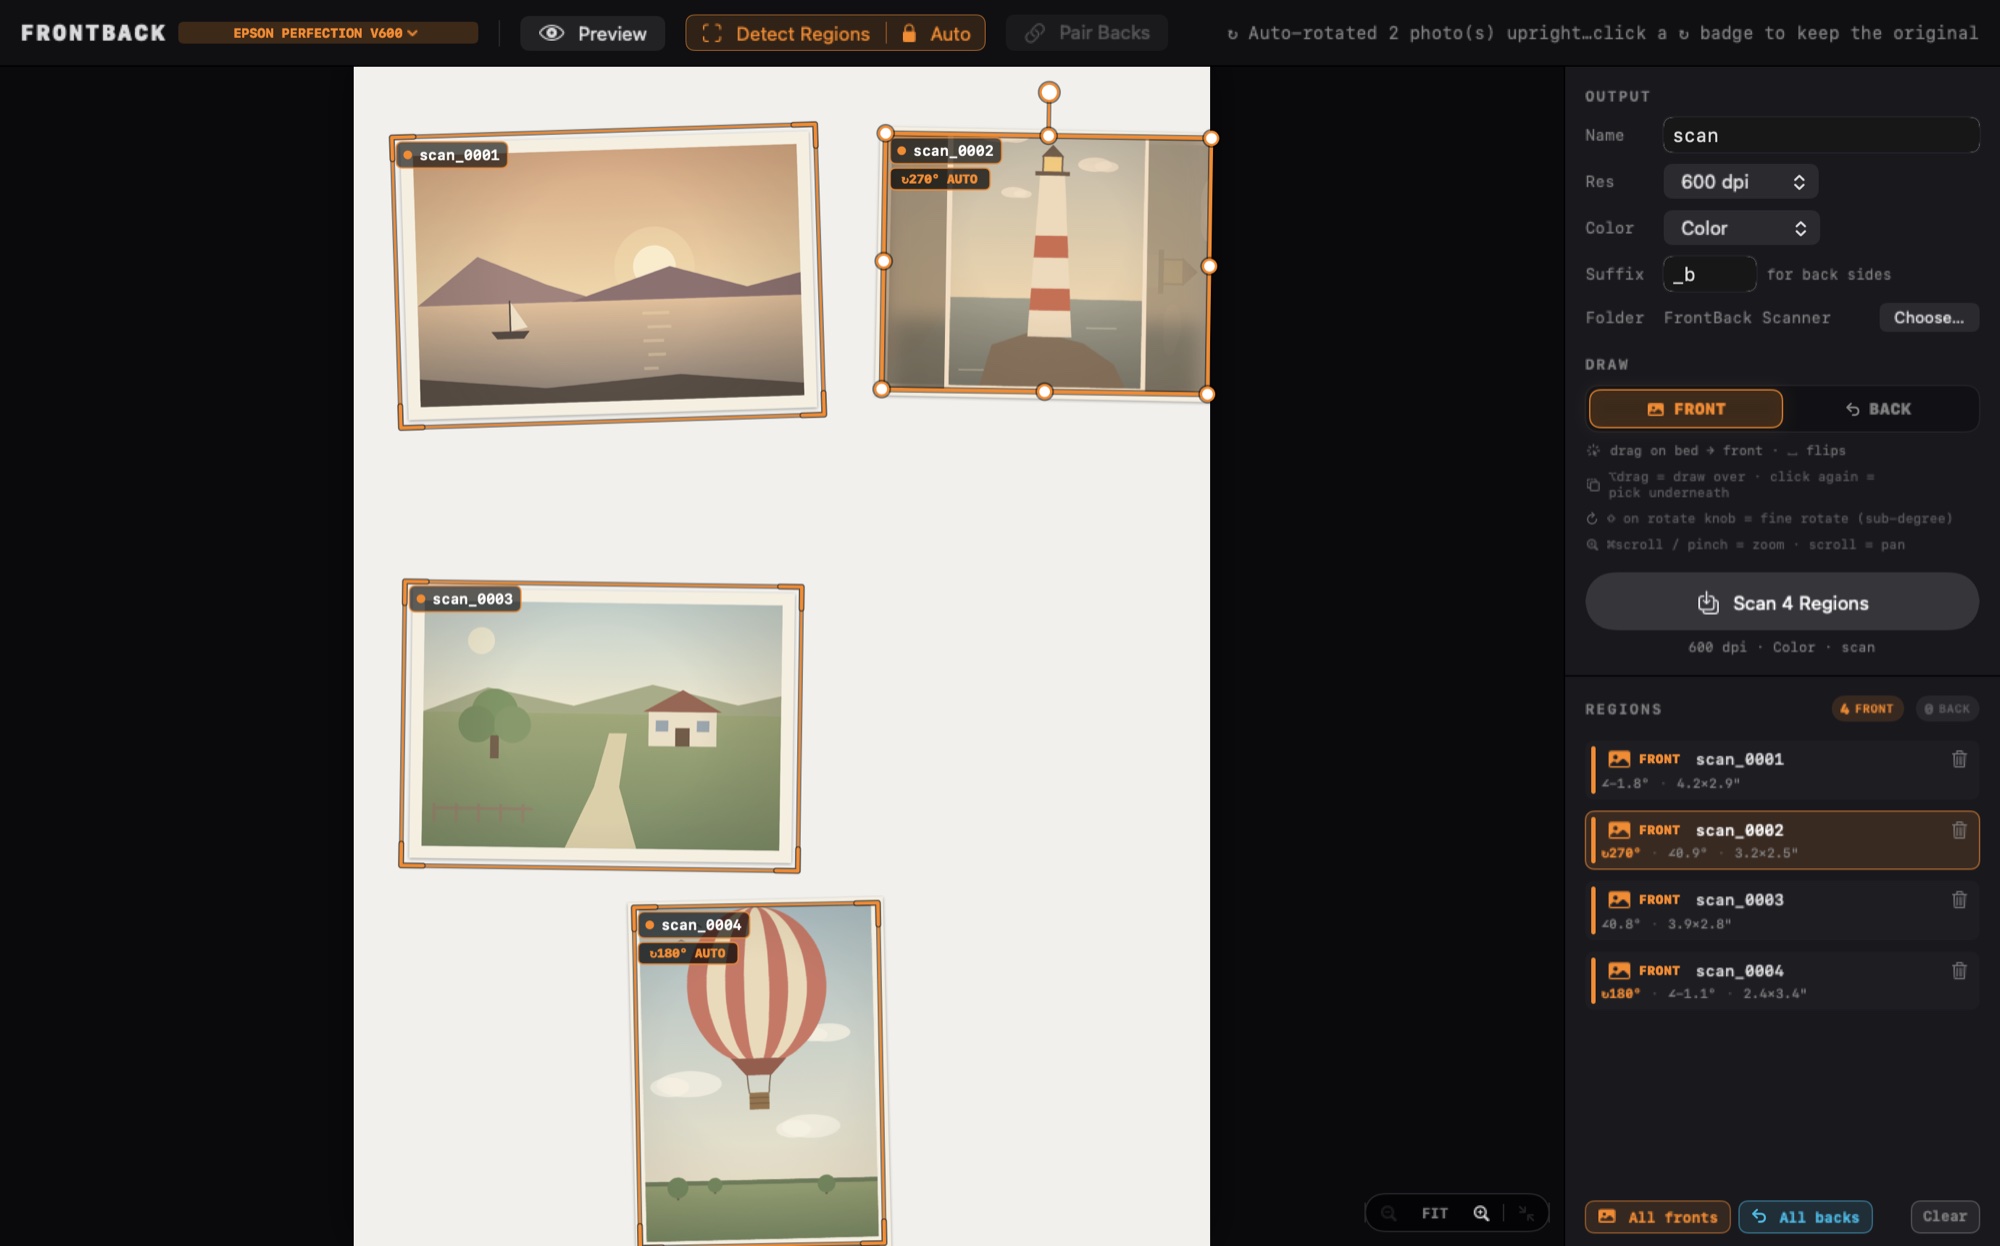
Toolbar (top). The scanner picker, Preview, the Detect Regions control with its Auto lock, Pair Backs, and a status line that narrates what the app just did.
Bed (left). A live preview of the glass. Every photo the app finds gets an amber box, a filename tag, and its own handles. Everything here is clickable and draggable.
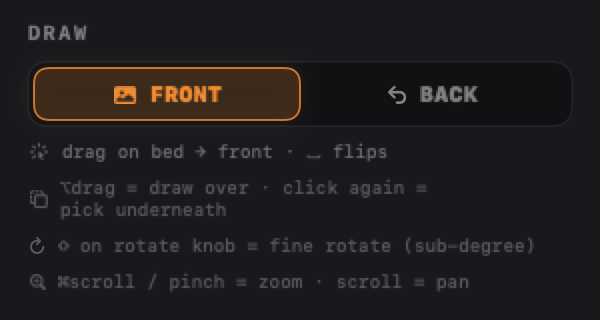
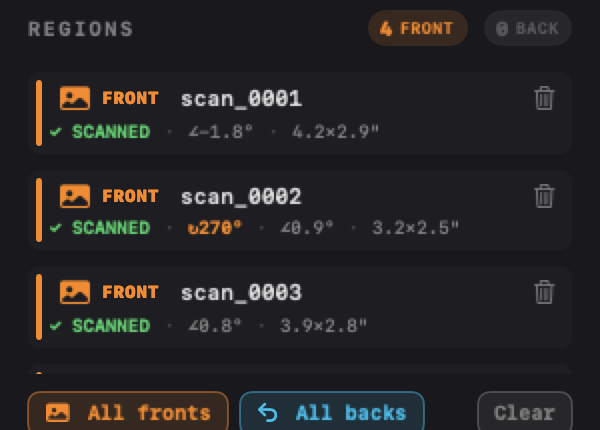
Sidebar (right). Output settings (name, resolution, color, back suffix, folder), the draw-side switch, the Scan button, one row per region, and thumbnails of what you just saved.
Zoom cluster (bottom-right of the bed). Reads FIT at rest and shows the zoom percentage while you are in close.
Regions
Boxes on the Bed
Auto-detect draws the boxes for you, but every box stays fully hand-editable.
- Draw a box: drag on empty glass. It becomes a front or a back depending on the draw-side switch in the sidebar.
- Select: click a box. Where boxes overlap, click again to select the one underneath. Clicking empty glass deselects.
- Move: drag the selected box by its body.
- Resize: corner handles resize freely; edge handles resize along that one axis. You can grab any box's edge without selecting it first.
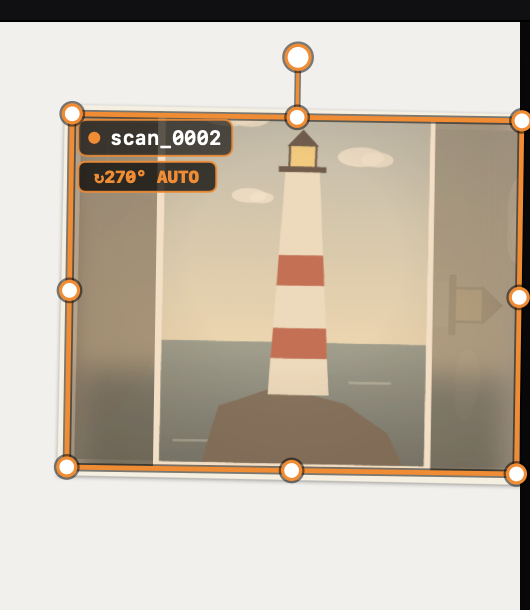
- Rotate: drag the round knob above the box. It snaps to perfectly square only when you are within about a third of a degree, so a deliberate slight tilt sticks.
- Fine rotate: hold ⇧ Shift on the knob and it gears down 8 to 1 with no snapping, for sub-degree nudges.
- Draw over: hold ⌥ Option and drag to force a brand-new box, even starting on top of the selected one.
- Delete: press ⌫, click the trash can on the region's sidebar row, or right-click the box and choose Delete.
Precision
Zoom & Pan the Bed
For nudging a crop edge by a hair, get in close. The bed zooms to 800%.
- Zoom in and out: hold ⌘ and scroll, or pinch the trackpad. The point under your cursor stays put.
- Quick zoom: double-tap with two fingers to jump to 250% at the cursor; double-tap again to fit the whole bed.
- Pan: once zoomed, plain scrolling moves around the bed in any direction.
- The cluster: the − and + buttons step the zoom, the readout shows FIT or the current percentage, and the last button snaps back to fit.
Detection
Auto-Detect, Locked or Manual
- Detect Regions finds every photo on the current preview and boxes each one, tilt measured, name assigned. It replaces whatever boxes are on the bed.
- The lock beside it chooses when detection runs. Auto (the whole control glows amber) re-runs it after every preview, so a fresh bedful boxes itself. Manual leaves your hand-drawn boxes alone. The setting is remembered between launches.
- Back sides too: with the draw side set to BACK, Detect Regions hunts for handwriting instead of photo edges, so it can box faint pencil notes on otherwise blank photo backs.

Auto-orientation
Sideways Photos Fix Themselves
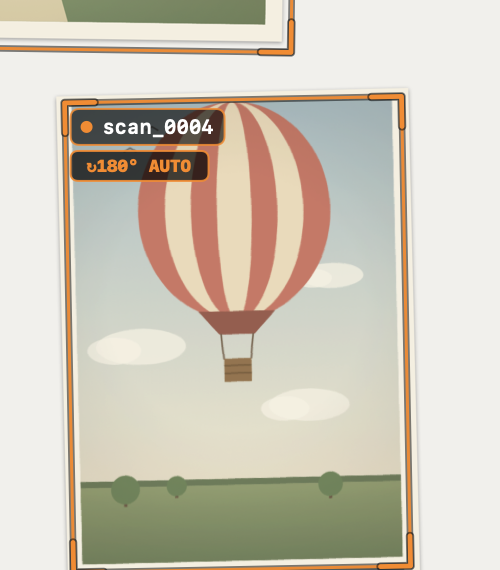
Lay photos any way they land. A neural network, 99.8% accurate in our benchmarks, checks each print and saves it right-side up.
- The ↻ badge. A print lying sideways or upside down gets a badge under its name, like ↻180° AUTO, and previews upright on the bed itself. Sideways prints sit letterboxed over a blurred fill so you can see exactly what will be saved.
- Trust it or veto it. Files save upright while the badge reads AUTO. Click the badge (or right-click the photo and choose “Keep original orientation”) to keep the photo exactly as it lies; click again to re-enable.
- It knows when it is unsure. Below a confidence threshold the detector abstains and leaves the photo untouched rather than guessing.
- Always current. Moving a photo or taking a new preview re-checks it, and the sidebar row shows the pending turn as an amber ↻ capsule.
Fronts & backs
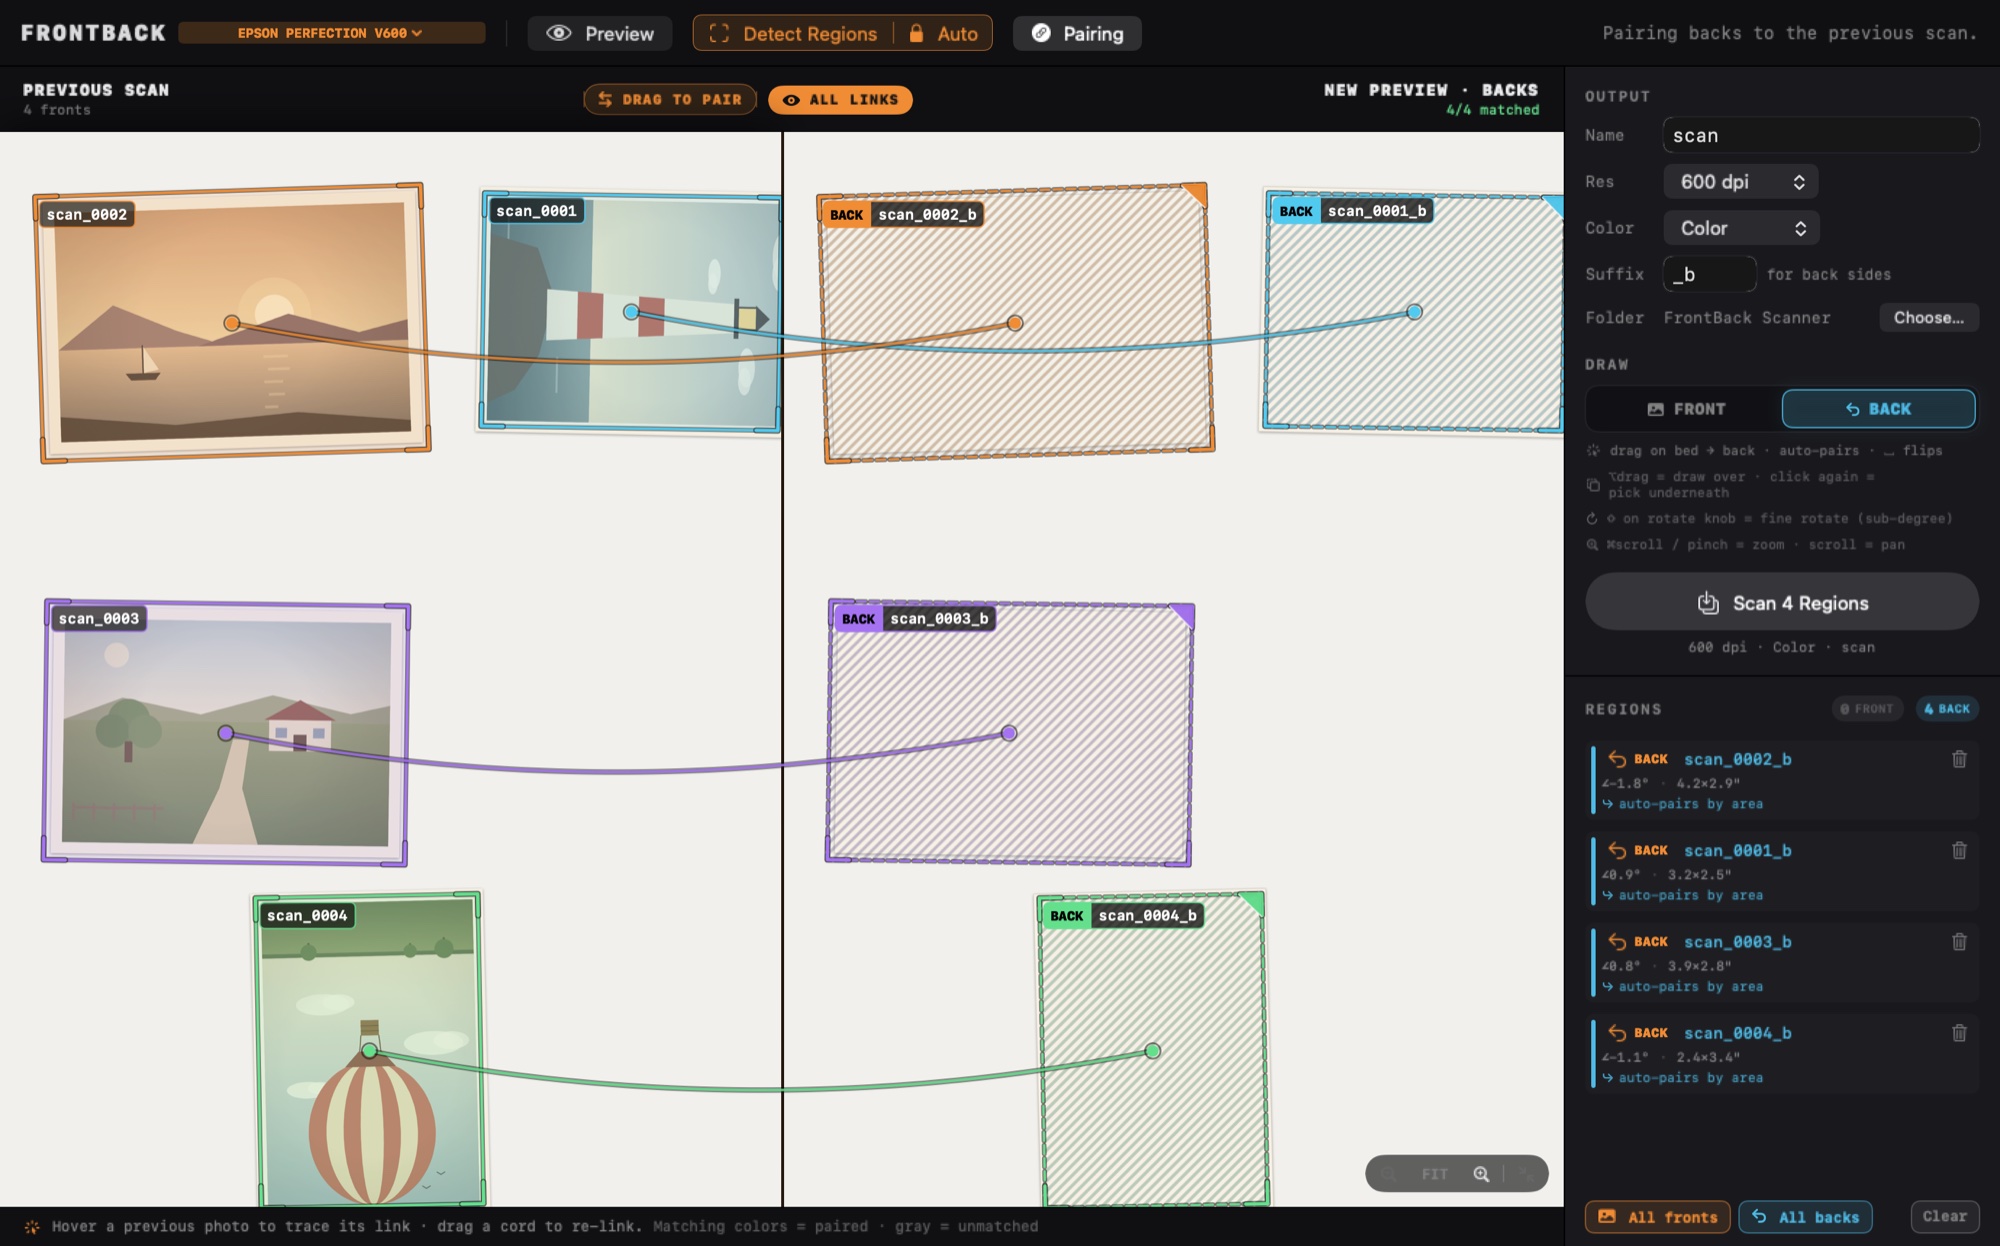
Pairing Fronts With Backs
Flip each photo where it lies and the app pairs by position automatically. These are the controls for everything else.
The draw side
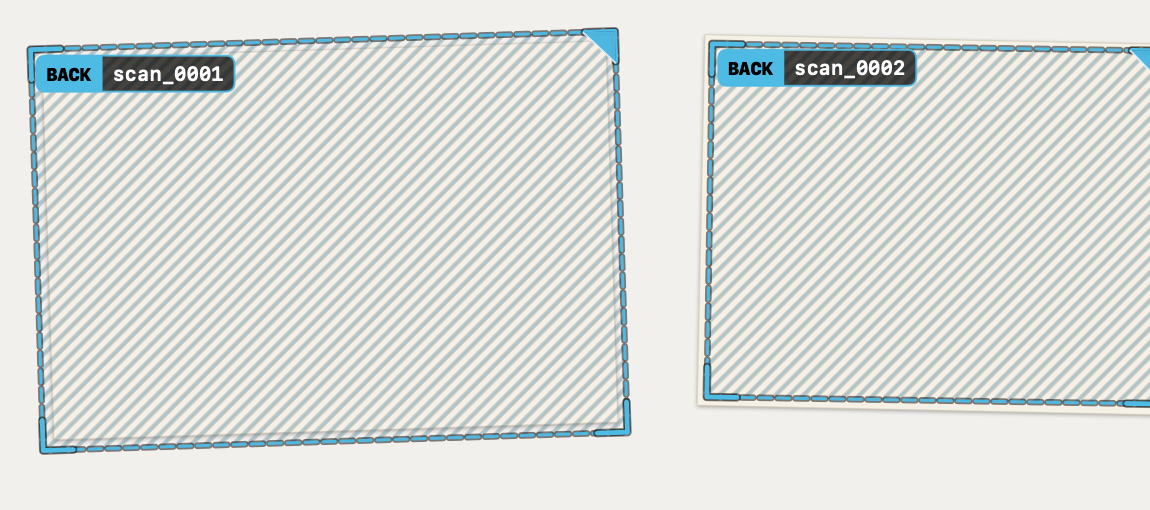
- The FRONT / BACK switch in the sidebar sets which side newly drawn (and newly detected) boxes belong to. Backs are cyan, wear a BACK keycap and a hatched fill, and pair to a front automatically by bed position.
- Press ␣ Space to flip the selected box between front and back; with nothing selected, Space toggles the draw side itself.
- The All fronts, All backs, and Clear chips under the region list convert or clear the whole bed in one click.
Rewiring a pair by hand
- Right-click a box and choose Link to front… (or Link to back…). A cord follows your cursor; click the partner to tie the pair. Esc cancels.
- Or use the sidebar: click the FRONT / BACK capsule on any region row to flip its side or point a back at a specific front: another box on the bed, or one of your recently saved files.
Pairing mode
- After you scan a batch of fronts and preview the flipped pile, Pair Backs in the toolbar opens a split view: the previous scan on the left, the new preview on the right, with each matched pair sharing a color. Gray means unmatched.
- Hover a photo on the left to trace its link. Drag a cord from a left-hand photo onto a back on the right to re-pair them by hand. ALL LINKS traces every pair at once.
Output
Scanning & Your Files
- Preview is a fast, low-resolution pass over the whole bed. The physical button on the scanner itself triggers Preview too.
- Scan N Regions makes one pass at full quality across the photos, then crops each box losslessly into its own file. A photo cropped out of a group scan is pixel-identical to scanning it alone.
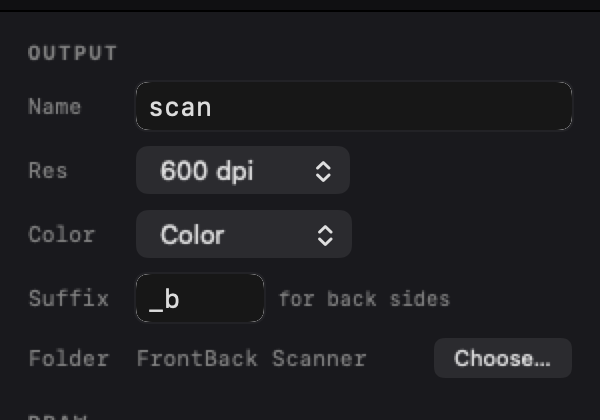
- Output settings: the filename base (
scanby default), resolution up to your scanner’s full optical DPI, Color / Grayscale / B&W, the back-side suffix (_bby default), and the destination folder. Files save as high-quality JPEG with the true DPI embedded, so they open at their real physical size. - Saved means saved. Every saved region gets a green check on its bed label and its sidebar row, and the bed wears a green SCANNED seal once everything on it is captured. Move a photo or take a new preview and the marks clear, so a stale check can never lie to you.
- LAST SAVE and HISTORY thumbnails at the bottom of the sidebar open the actual file when clicked.
Reference
Keyboard & Mouse Cheat Sheet
| ⌫ Delete | Remove the selected box |
| ␣ Space | Flip the selected box front ↔ back, or toggle the draw side |
| Esc | Cancel an in-progress link |
| ⇧ Shift + rotate knob | Fine rotate, geared 8:1, no snapping |
| ⌥ Option + drag | Draw a new box, even over the selected one |
| ⌘ Cmd + scroll, or pinch | Zoom at the cursor, up to 800% |
| Scroll | Pan the bed while zoomed in |
| Two-finger double-tap | Zoom to 250%, or back to fit |
| Click again | Select the box underneath a stack |
| Right-click a box | Flip side, keep original orientation, link to a partner, delete |
Now Point It at the Shoebox
Free, private, and faster than you thought scanning could be.
↓ Download FrontBack ScannerThen let Timeline Scan date every photo
Curious why the backs matter? See the FrontBack Scanner tour or read our scanning best practices.